


Frequently Asked Questions
COMMON QUESTIONS
1. How does this design ferment beer properly if there is no airlock?
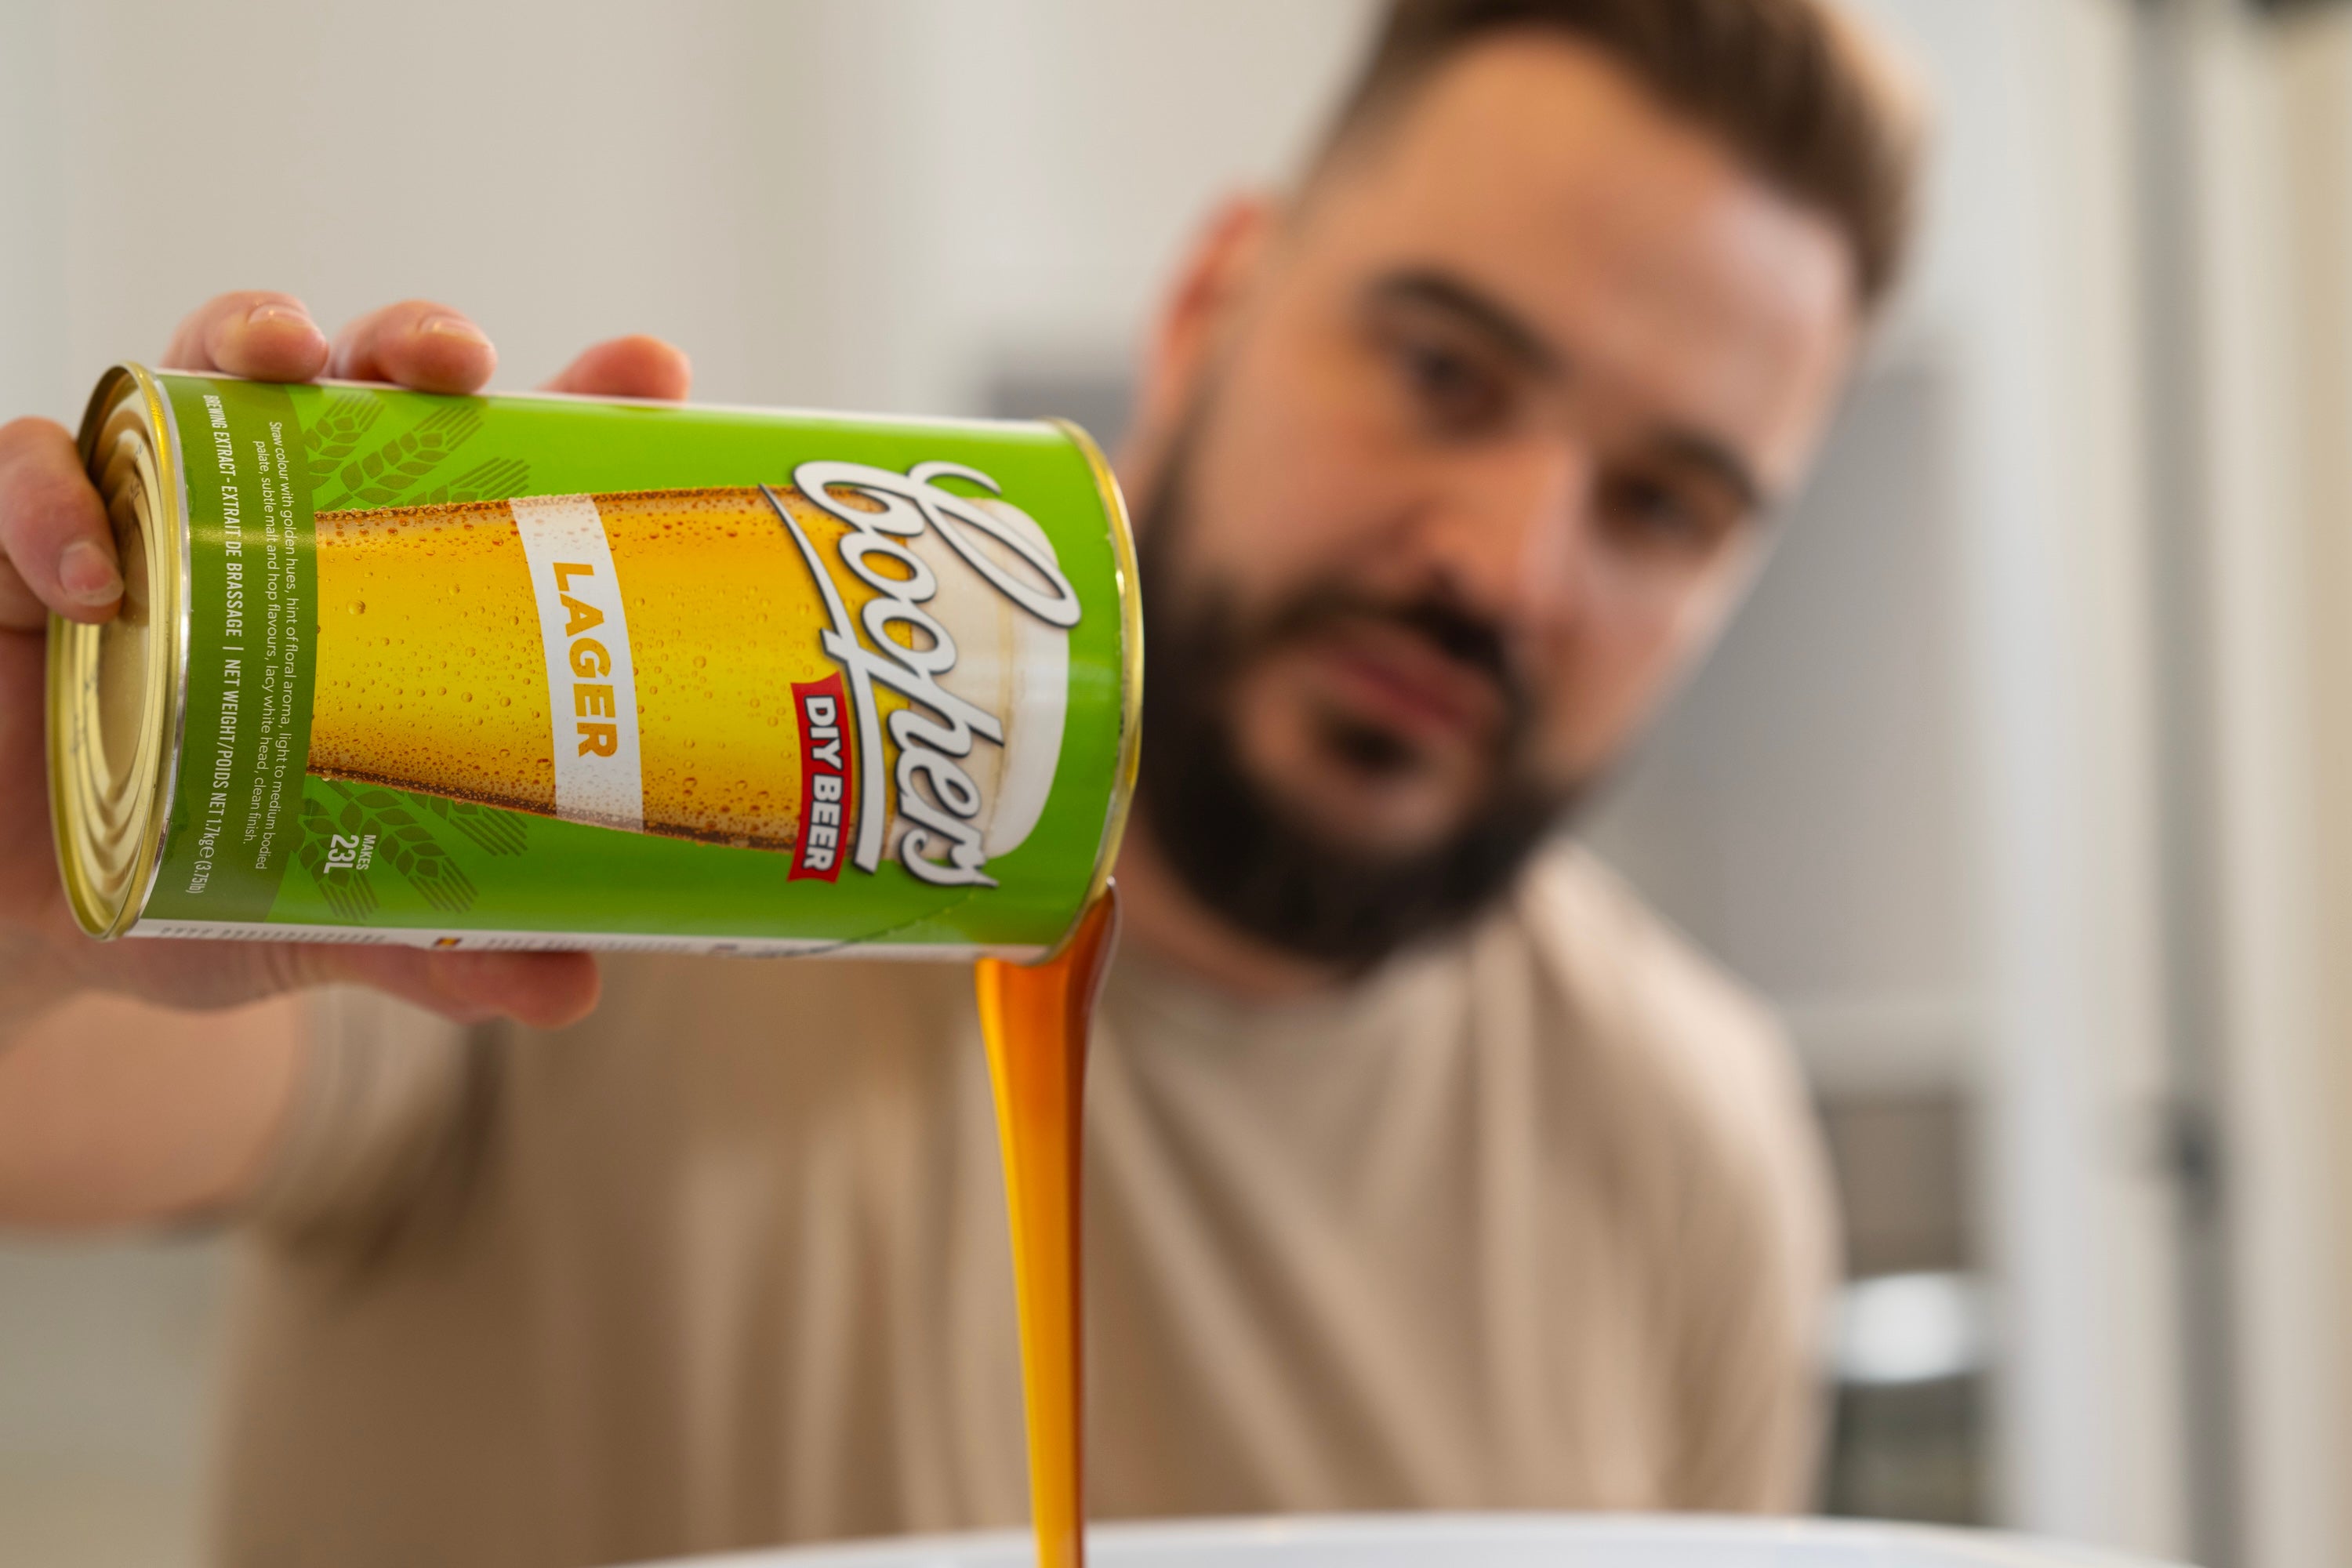
Numerous commercial breweries, around the world, make excellent beer using open style fermenting vessels. So an airlock is not required for fermentation to take place. However, the DIY Beer Kit comes with a lid to prevent ingress of foreign organisms while allowing CO2 gas to escape.
2. How do I determine the amount of alcohol in my brew?
The approximate alcohol content can be calculated by firstly measuring with a hydrometer the density (known as Specific Gravity, SG) of the brew before it has started fermenting and once it has finished fermenting then plugging these two figures into a formula. It is important to stress that we, as DIY Brewers, can’t measure the alcohol content directly and this method is only an approximation of the percentage of alcohol by volume (ABV). OG is the Original Gravity (SG of the brew as it has been mixed) FG is the Final Gravity (SG of the brew once fermentation has finished)
(OG – FG) / 7.46 = Approx % Alcohol By Volume
For example, a brew with OG = 1036, FG = 1012: (1036 – 1012) / 7.46 = 3.2% ABV.
Note: allow for an extra 0.3% to 0.5% ABV due to the addition of Carbonation Drops (or sugar) in the bottle.
3. How do I know when fermentation is underway?
Signs of fermentation are:
- Foaming
- Cloudiness in the brew
- Obvious convection within the brew.
- A sample drawn from the tap is fizzy
- The density has dropped to less than the OG.
JUST GOT A 23L BREW KIT
1. How does this design ferment beer properly if there is no airlock?
Numerous commercial breweries, around the world, make excellent beer using open style fermenting vessels. So an airlock is not required for fermentation to take place. However, the DIY Beer Kit comes with a lid to prevent ingress of foreign organisms while allowing CO2 gas to escape.
2. Do I need to use the Krausen Kollar with every brew?
You can ferment your brew without the Krausen Kollar in place if you like. However, we recommend using the Krausen Kollar because it increases the total headspace, which helps to contain the foam. Also, it catches the deposit made by the foam – once the foam collapses the Krausen Kollar may be removed while the deposit is still soft and moist, then easily cleaned ready for the next brew.
3. What are the two white clips for?
These are designed to secure the Lid and Krausen Kollar together, effectively making them work as the one unit. This prevents the lid from being pushed off by the foam during a particularly aggressive fermentation, such as an Imperial Stout fermentation.
4. The tap is a bit difficult to insert into the fermenting vessel, so is it okay to use a lubricant?
Wetting the plunger before putting the tap together and wetting the O rings before inserting the tap into the fermenting vessel should be all that is required as lubrication.
5. Once the brew is mixed I notice material floating and settling to the bottom of the FV, is this a problem?
Don’t worry, this is known as “cold break” and it’s perfectly normal. In fact, it is a good thing! Normally, Cold Break forms in the brewery when the wort is cooled. However, our beer kits and malt extracts are not allowed to cool prior to being concentrated to about 80% solids. Once at this density, the cold break cannot precipitate out of solution. Cold Break can only precipitate out once the beer kit and or malt extract is reconstituted (diluted with water).
6. Do you have instructions or can I watch an instructional video on how to use your DIY Beer Kit?
Basic instructions can be found on the reverse side of the brew can label. Our how to videos are accessible via the Brewing Support page: https://www.diybeer.com/au/brewing-support/
Please contact us direct if you'd like basic brewing written instructions, emailed to you.
7. Do you have a brewing forum?
You are sure to find helpful tips and advice from avid DIY brewers & our friendly DIY Beer team when you visit our Community: https://community.diybeer.com/
8. Who should I contact if I cannot find the answer to my brewing questions in the FAQs or the Forum?
Should you require further assistance please do not hesitate to contact our friendly DIY Beer Team.
Email: customerservice@coopers.com.au
Brewing Helpline: 1300 654 455 (from within Australia Only) or +61 (08) 8440 1800 (for overseas callers)
9. How do I determine the amount of alcohol in my brew?
The approximate alcohol content can be calculated by firstly measuring with a hydrometer the density (known as Specific Gravity, SG) of the brew before it has started fermenting and once it has finished fermenting then plugging these two figures into a formula. It is important to stress that we, as DIY Brewers, can’t measure the alcohol content directly and this method is only an approximation of the percentage of alcohol by volume (ABV). OG is the Original Gravity (SG of the brew as it has been mixed) FG is the Final Gravity (SG of the brew once fermentation has finished)
(OG – FG) / 7.46 = Approx % Alcohol By Volume
For example, a brew with OG = 1036, FG = 1012: (1036 – 1012) / 7.46 = 3.2% ABV.
Note: allow for an extra 0.3% to 0.5% ABV due to the addition of Carbonation Drops (or sugar) in the bottle.
10. Do I need to sanitise all the brewing equipment?
The first time you use your kit from new, you can just rinse it in hot water. Just remember, whenever you’re cleaning your equipment, only use a soft cloth that won’t scratch it. For future brews, we recommend that you sanitise all your brewing equipment before each brew. Note: santising is most effective on equipment that has already been cleaned (free from any any obvious soiling).
11. What chemicals do you recommend for sanitising?
We recommend products which carry Oxygen Bleaching capacity (active ingredient - Sodium Percarbonate), such as Hypo-Allergenic or Sensitive Napisan type products. In the absence of these products, normal unscented household bleach (active ingredient - Sodium Hypochlorite) may be used. To sanitise using Oxy Bleach Sanitiser: Dissolve 4 tablespoons of Sanitiser in the Fermenting Vessel (FV) with one litre of hot/warm water. Place all equipment in the FV, fill to the brim with cold water and let soak overnight (or at least 2 hours). Drain the FV through the tap and rinse all equipment thoroughly to remove any remaining suds.
To sanitise using Unscented Household Bleach: Add ¼ cup of unscented household bleach to the FV. Place all equipment in the FV, fill with cool water and let soak overnight (or at least 30mins). Rinse out with hot water to remove all traces of chlorine smell.
The FV lid need only be cleaned then rinsed with hot water.
12. How do I know when fermentation is underway?
Signs of fermentation are:
- Foaming
- Cloudiness in the brew
- Obvious convection within the brew.
- A sample drawn from the tap is fizzy
- The density has dropped to less than the OG.
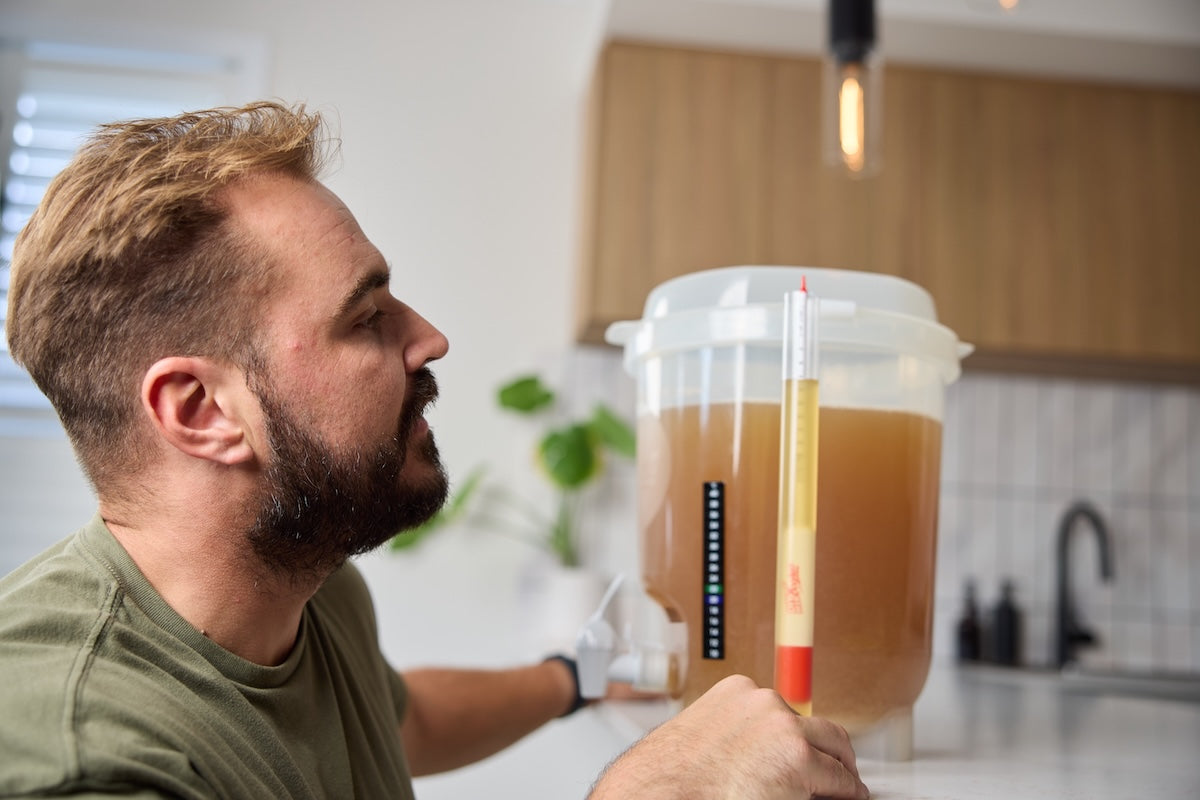
13. What is a Hydrometer and when do I use it?
The hydrometer is a calibrated instrument used to determine the Specific Gravity (SG) of the brew. SG is the density of a liquid relative to the density of water. With the hydrometer floating, the SG is read at the point where the graduated scale cuts the surface of the liquid in the sample flask (meniscus).
To get an accurate reading you may need to 'de-gas' your sample. To do this, pass the sample from one glass to another and back again four to five times, then return the sample to the flask. Ensure that enough beer is in the flask to allow the hydrometer to float freely and the surface is relatively free of foam. To dislodge bubbles clinging to the Coopers DIY Beer plastic hydrometer, tap the floating hydrometer downward so that it bumps on the base of the measuring tube. DO NOT attempt this with a glass hydrometer (read the below FAQ for more on glass hydrometers).
Please note that FG may vary from brew to brew. So it’s important to ensure that the FG is stable over two days prior to bottling.
For more information, click to watch our how-to-video on Hydrometer Use.
14. How can I keep my brew at the right temperature?
Try to keep the brew at the lower end of the 21°C-27°C range. Some ways you can do this include storing the fermenter inside at ambient temperature, placing it in an insulated cabinet, wrapping it in a blanket, purchasing a heat belt or placing the fermenter in a tub/sink of cool water.
JUST GOT A 10L SMALL BATCH BREW KIT
1. How much beer does the DIY Beer Small Batch Brew Kit make?
The DIY Beer Small Batch Brew Kit is designed to make 10 litres of beer. That's equivalent to a carton.
2. Are there instructions for the Small Batch Brew Kit?
Our how-to-videos are available on the Brewing Support page.
To get started see our How to Brew Video.
You may also like to view our video on using the optional Small Batch Brew Kit Krausen Kollar.
3. Is a Krausen Kollar available for the Small Batch Brew Kit?
4. Do I need to sanitise all the brewing equipment?
The first time you use your kit from new, you can just rinse it in hot water. Just remember, whenever you’re cleaning your equipment, only use a soft cloth that won’t scratch it. For future brews, we recommend that you sanitise all your brewing equipment before each brew.
Note: santising is most effective on equipment that has already been cleaned (free from any obvious soiling).
5. What chemicals do you recommend for sanitising?
We recommend products which carry Oxygen Bleaching capacity (active ingredient - Sodium Percarbonate), such as Hypo-Allergenic or Sensitive Napisan type products. In the absence of these products, normal unscented household bleach (active ingredient - Sodium Hypochlorite) may be used. To sanitise using Oxy Bleach Sanitiser: Dissolve 4 tablespoons of Sanitiser in the Fermenting Vessel (FV) with one litre of hot/warm water. Place all equipment in the FV, fill to the brim with cold water and let soak overnight (or at least 2 hours). Drain the FV through the tap and rinse all equipment thoroughly to remove any remaining suds.
To sanitise using Unscented Household Bleach: Add ¼ cup of unscented household bleach to the FV. Place all equipment in the FV, fill with cool water and let soak overnight (or at least 30mins). Rinse out with hot water to remove all traces of chlorine smell.
The FV lid need only be cleaned then rinsed with hot water.
6. The tap is difficult to insert into the fermenting vessel, is it okay to use a lubricant?
Wetting the plunger before putting the tap together and wetting the O rings before inserting the tap into the fermenting vessel should be all that is required as lubrication.
7. Once the brew is mixed I notice material floating and settling to the bottom of the fermenting vessel, is this a problem?
Don’t worry, this is known as “cold break” and it’s perfectly normal. In fact, it is a good thing! Cold Break usually forms in the brewery when the wort is cooled. However, our beer kits and malt extracts are not cooled before being concentrated to approximately 80% solids. At this concentration, the cold break remains dissolved and cannot precipitate out. Once the beer kit or malt is reconstituted (diluted with water), the Cold Break is then able to preciptiate out of solution, which is what you are seeing.
8. How do I know when fermentation is underway?
Signs of fermentation are:
- Foaming
- Cloudiness in the brew
- Obvious convection within the brew.
- A sample drawn from the tap is fizzy
- The density has dropped to less than the OG.
9. How can I keep my brew at the right temperature?
Try to keep the brew at the lower end of the 21°C-27°C range. Some ways you can do this include storing the fermenter inside at ambient temperature, placing it in an insulated cabinet, wrapping it in a blanket, purchasing a heat belt or placing the fermenter in a tub/sink of cool water.
10. What is a Hydrometer and when do I use it?
The hydrometer is a calibrated instrument used to determine the Specific Gravity (SG) of the brew. SG is the density of a liquid relative to the density of water. With the hydrometer floating, the SG is read at the point where the graduated scale cuts the surface of the liquid in the sample flask (meniscus).
To get an accurate reading you may need to 'de-gas' your sample. To do this, pass the sample from one glass to another and back again four to five times, then return the sample to the flask. Ensure that enough beer is in the flask to allow the hydrometer to float freely and the surface is relatively free of foam. To dislodge bubbles clinging to the Coopers DIY Beer plastic hydrometer, tap the floating hydrometer downward so that it bumps on the base of the measuring tube. DO NOT attempt this with a glass hydrometer (read the below FAQ for more on glass hydrometers).
Please note that FG may vary from brew to brew. So it’s important to ensure that the FG is stable over two days prior to bottling.
For more information, click to watch our how-to-video on Hydrometer Use.
11. What is the expected alcohol level after secondary fermentation in the bottle when made to recommended 10 litres?
The approximate expected percentage alcohol by volume (ABV) will be 4.5% when brewing the Lager, Australian Pale Ale or Mexican Cerveza brewing extracts to the directions on the pack. The Ultra Crisp Mid will be approximately 3.5% ABV when brewed to instructions.
12. Where can I buy Brewing Extracts for the Small Batch Brew Kit?
Coopers NEW 10L Brewing Extracts are made for Small Batch brewing. They include the best selling Coopers Lager, Australian Pale Ale and Mexican Cerveza, the NEW Ultra Light Mid, Ginger Beer and Apple Cider brewing extracts. They're ideal for brewing as directed when starting out, or using as a recipe base for those who want to get creative. Each extract is supplied with a specially selected yeast sachet, they are available via the Coopers Online Store and Big W stores nationally.
The Mr Beer Craft Series of 100% Malt beer brew cans, can also be brewed in the Small Batch Brew Kit. Available on the Coopers Online Store, they are specifically designed to produce a fuller bodied, full flavoured beer typical of Craft beer styles. Each variety uses quality malts, bittering and aromatic hops and specially selected yeast.
Alternatively, please email Online Store Support and they can provide you with specialist home brewing stores in your area that stock the Mr Beer Craft Series extracts.
13. Can I use the Coopers 1.7kg Brew Can in the Small Batch Brew Kit?
The Small Batch Brew Kit is specifically designed to make 10 litres of beer. For best results, we recommend using the Coopers 10L Brewing Extracts, Ginger Beer and Apple Cider Exracts and the Mr Beer Extracts when using the Small Batch Kit and fermenter.
The Coopers 1.7kg brew cans are designed for 23 litre brews. As such, using the entire can in the Small Batch Brew Kit will potentially create an unbalanced beer by
- Increasing bitterness
- Increasing colour
- Increasing alcohol content
- Increasing the density and therefore could make the final beer unpalatable for your taste.
14. Where do I use the lid clips?
The lid clips may be used to secure the lid to the FV. When using the Krausen Kollar (sold separately in Australia) during a more vigorous or high foaming brew the lid clips are used to secure the lid to the Krausen Kollar.
15. What are the dimensions of the Small Batch Brew Kit?
Outer Dimensions: Fermenter Diameter: 28cm Lid Diameter (including handles): 31cm Fermenter Height: 33.5cm Fermenter Height with lid: 37.5cm Kit Package Dimensions 42cm H x 28cm L x 28cm W
Capacity: The total volume of the Small Batch Brew Kit is 15 litres (Fermenting Vessel = 13.3 litres & Lid = 1.7 litres) specifically designed to accommodate 10 litre brews with 3.3 litres head space (the space required for foaming during fermentation).
Using with the Small Batch Krausen Kollar extends the head space by 2 litres. Higher alcohol and darker brews or brews using a vigorous fermenting yeast strain may require the krausen kollar.
For more information view the Small Batch Brew Kit Krausen Kollar Instructional Video.
16. Who should I contact if I cannot find the answer to my brewing questions in the FAQs or the Forum?
Should you require further assistance please do not hesitate to contact our friendly DIY Beer Team.
Email: customerservice@coopers.com.au
Brewing Helpline: 1300 654 455 (from within Australia Only) or +61 (08) 8440 1800 (for overseas callers)
PRODUCT INFO
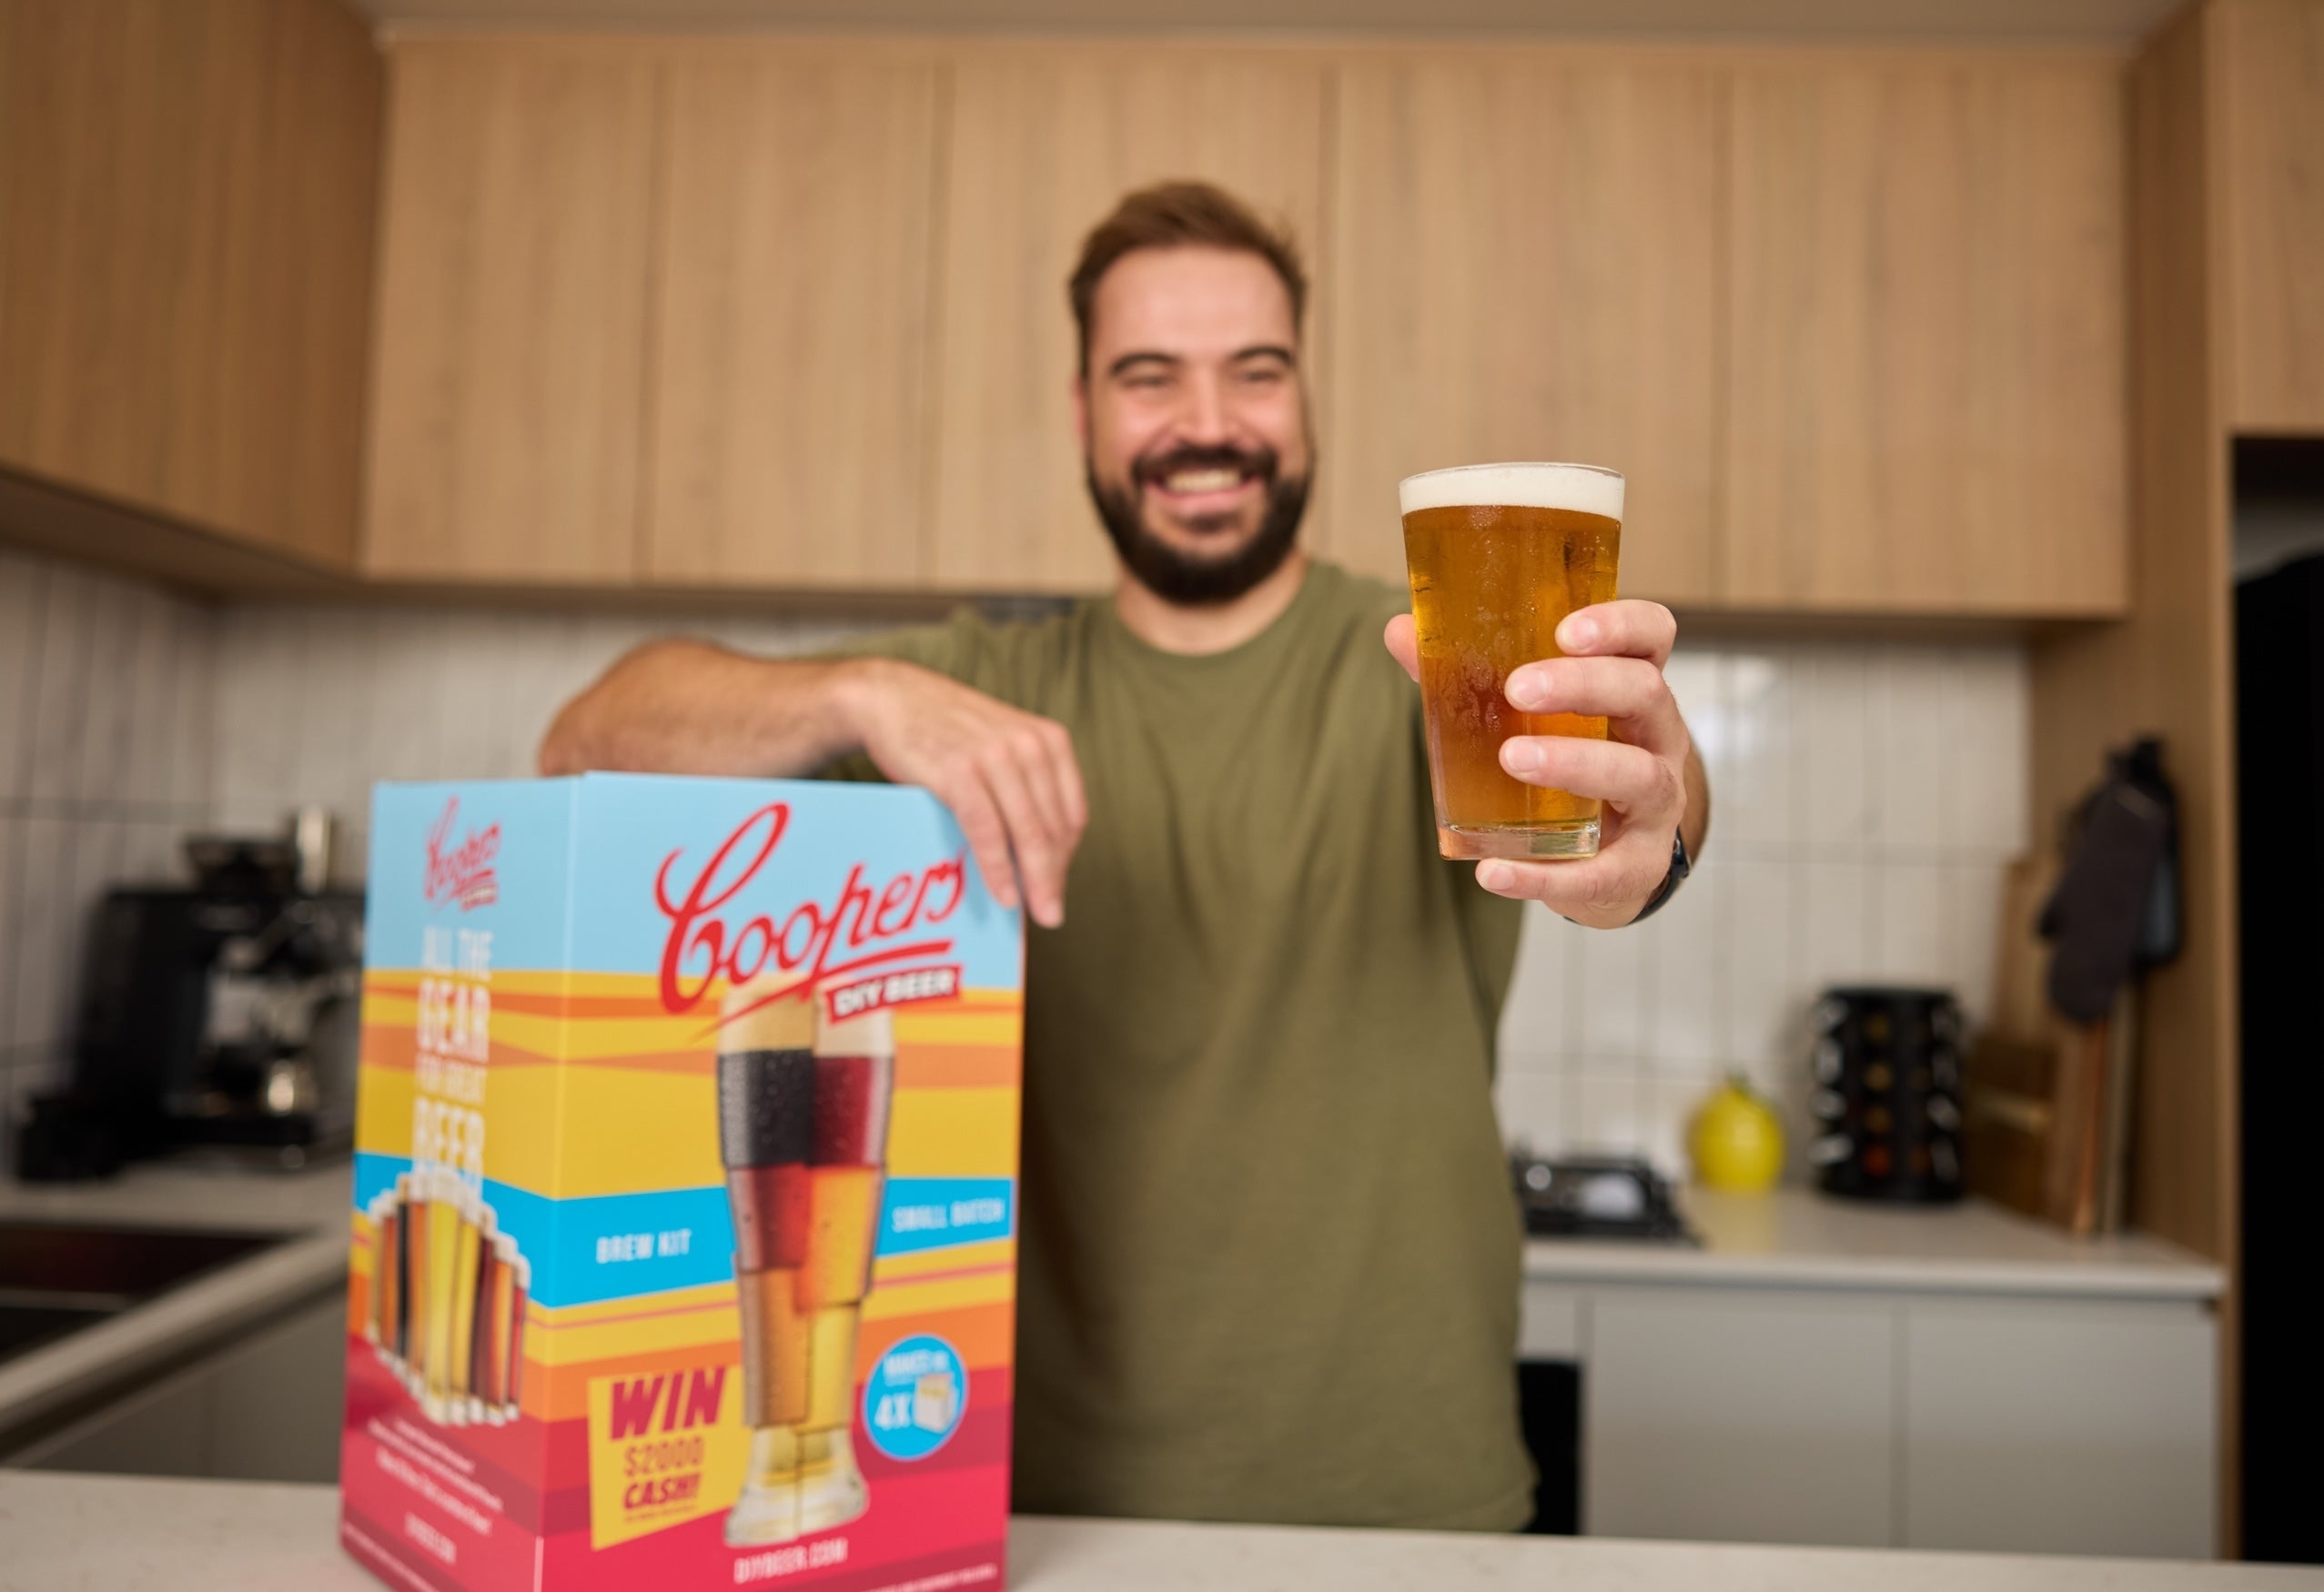
1. Where can I buy Coopers DIY Beer brewing products?
The Coopers DIY Beer Brew Kit (23L) is available at BIG W, Dan Murphys, Tentworld and direct from Coopers Online Store.
The Coopers DIY Beer Small Batch Brew Kit (10L) is available at Big W and direct from the Coopers Online Store.
The complete range of Coopers DIY Beer products with the freshest brewing extracts are available to purchase at the Coopers Online Store.
Products from our Original, International and Small Batch Series and additional Ingredients (brewing sugars) are available at Big W, Dan Murphy's, Tentworld, Woolworths, Coles, IGA's and Foodworks nationwide and Foodland (SA), Drakes (SA & QLD) and Ritchies (NSW, QLD & Vic) supermarkets.
Please note that product availability will vary from each store brand and within their individual store networks.
Thomas Coopers Series brewing extracts are available direct from the Coopers Online Store and in specialist brewing stores.
2. What's the difference between Brewing Sugar, Brew Enhancer 1, etc?
The sugar composition of Coopers Brewing Sugars are:
Light Dry Malt - 100% light dry malt
Dextrose - 100% dextrose
Brewing Sugar - Predominantly dextrose with maltodextrin
Brew Enhancer 1 - Predominantly dextrose with maltodextrin (a higher proportion of maltodextrin than Brewing Sugar)
Brew Enhancer 2 - Predominantly dextrose with maltodextrin and light dry malt
Brew Enhancer 3 - Predominantly light dry malt with dextrose and maltodextrin
3. Are Coopers Brew Enhancers supposed to be added as well as sugar?
They are intended to be used instead of white sugar or dextrose. Recipe ideas can be found here. For more consistent carbonation levels, Coopers Carbonation Drops or normal white sugar should be used for priming the bottles.
4. Why has my Coopers Brew Enhancer 2 or Coopers Brew Enhancer 3 gone hard?
You may at times find that Brew Enhancer 2 or 3 has hardened. This is due to spray dried Light Malt Extract being very hygroscopic and if stored in a warm area, may draw moisture from the Dextrose causing it to briefly liquify and then solidify. Please rest assured that there is no detrimental effect on the finished beer using the solidified Enhancer. It does not need to be crushed or broken up, simply place the entire block into the fermenter. It will dissolve and ferment as usual at the same rate as if in powdered form.
5. What is a Carbonation Drop?
Coopers Carbonation Drops look like boiled lollies and contain the equivalent of 3g of sugar. Use them instead of measuring out white sugar to speed up the bottling process. The drops will dissolve within an hour or so and plume through the brew. There is no need to invert the bottles.
6. Why is the best before date on the can okay but the yeast is out of date?
Yeast sachets are packaged in readiness for a brew can packaging run. The code on the yeast sachet is a Julian Date Code, representing the date that the yeast was packaged rather than a “Use By” or “Best Before” date. e.g. a sachet with 25019 was packaged on the 7th of September, which is the 250th day of 2019. While the beer kit, containing this yeast sachet, may have been produced on Thursday the 13th of September 2019, carrying a Best Before date of 13/09/21.
7. Will the brew be okay to make if the can is past the best before date?
Coopers DIY Beer brew cans contain hopped liquid malt extract. Even though liquid malt extract is quite stable, it darkens over time and develops toffee/molasses like aromas and flavours. This process is accelerated when temperature is increased. This is not such a bad thing with intentionally dark brews but may be undesirable with lighter styles. If you wish to persist with making up a brew past its Best Before date (out of curiosity or otherwise) it’s worth getting fresh yeast from a Brewing Specialist store to ensure that the brew ferments thoroughly.
8. Can I use half the 1.7kg DIY beer kit to make a smaller brew and then use the other half later?
Yes you can but the balance of the kit must be covered with cling film and stored in the refrigerator for no longer than two weeks.
9. Should I boil the kit to remove break?
We brew beer, malt extract and beer kit wort in the same way. All worts are boiled and produce hot break, which is then removed in the whirlpool. Rather than being cooled down for fermentation, the malt extract and beer kit worts are centrifuged and transferred to evaporators where all but around 20% of the water is removed. At this stage the malt extract or beer kit wort is packaged then it cools down but does not throw cold break material because the extract is too dense for it to precipitate. Once you add water, the wort becomes thin enough for the break material to precipitate. This break material is completely harmless to the brew and will settle out during fermentation. If boiled the break material may clump together giving the impression, incorrectly, that it is hot break. Boiling a beer kit (hopped malt extract) will only darken the brew and drive off hop aroma. However, if you are following a specific recipe and using additional hops, you may like to boil some of the malt extract to achieve the expected hop utilisation for correct aroma, flavour and bitterness in the finished beer.
10. How is bitterness calculated?
The figures we quote for bitterness (IBU - International Bitterness Units) are specified for the product inside the can at the time of packaging. Of course, the product is concentrated, hence the seemingly high figures! Use the following formula to estimate a more realistic bitterness figure of the reconstituted and fermented brew.
To calculate the bitterness of the brew: Multiply the quoted product bitterness by the weight of the product (1.7kg) and divide by the total brew volume (normally 23 litres). We use the weight because our quoted colour/bitterness figures are based on a 10% weight/volume dilution.
Product bitterness x 1.7 / Brew volume = Brew Bitterness before fermentation
As an example, if a brew is made with Mexican Cerveza up to a volume of 23 litres: 270 x 1.7 / 23 = 20 IBU (International Bitterness Units)
This figure represents the brew bitterness prior to fermentation. Generally, fermentation reduces bitterness by between 10% to 30%. So final bitterness of the fermented brew may be anything from 14 to 18 IBU.
11. How is colour calculated?
The figures we quote for colour (EBC - European Brewery Convention) are specified for the product inside the can at the time of packaging. Of course, the product is concentrated, hence the seemingly high figures! Use the following formula to estimate a more realistic colour figure of the reconstituted and fermented brew.
To calculate the colour of the brew: Multiply the quoted product colour by the weight of the product (1.7kg) and divide by the total brew volume (normally 23 litres). We use the weight because our quoted colour/bitterness figures are based on a 10% weight/volume dilution.
Product colour x 1.7 / Brew volume = Brew colour
As an example, if a brew is made with Mexican Cerveza up to a volume of 23 litres: 53 x 1.7 / 23 = 3.9 EBC
Ensure to add the colour contribution of all ingredients together. Colour figures are quoted for liquid extract at the time of packaging as these products will darken with time. The darkening process is accelerated by exposure to elevated temperature.
12. Why is the non-alcoholic Ginger Beer not left in the fermenting vessel to ferment like other brews?
The non-alcoholic version of Coopers Ginger Beer only undergoes a single ferment. This ferment occurs in the bottle while the fermenting tub is used only for mixing the brew. The ferment in the bottle serves to carbonate the brew. Of course, with any fermentation, some alcohol is produced (approx 0.7% ABV) but not enough to be considered as an alcoholic beverage (< 1.15% ABV). Being a primary fermentation, there will be a small deposit around the fill line of the bottle as well as the normal sediment at the bottom.
13. Where do I find the unique code to enter the DIY Beer Kit competition?
The unique code to enter the DIY Beer Kit competition is located in the zip lock bag with the tap for 23L Brew Kits. For 10L Brew Kits the code is located with the yeast sachet on the back of the Brewing Extract pack. If you have any issues entering the competition please email store@coopers.com.au.
14. DIY Beer Sanitizer and Bottle Wash MSDS
Time to bottle
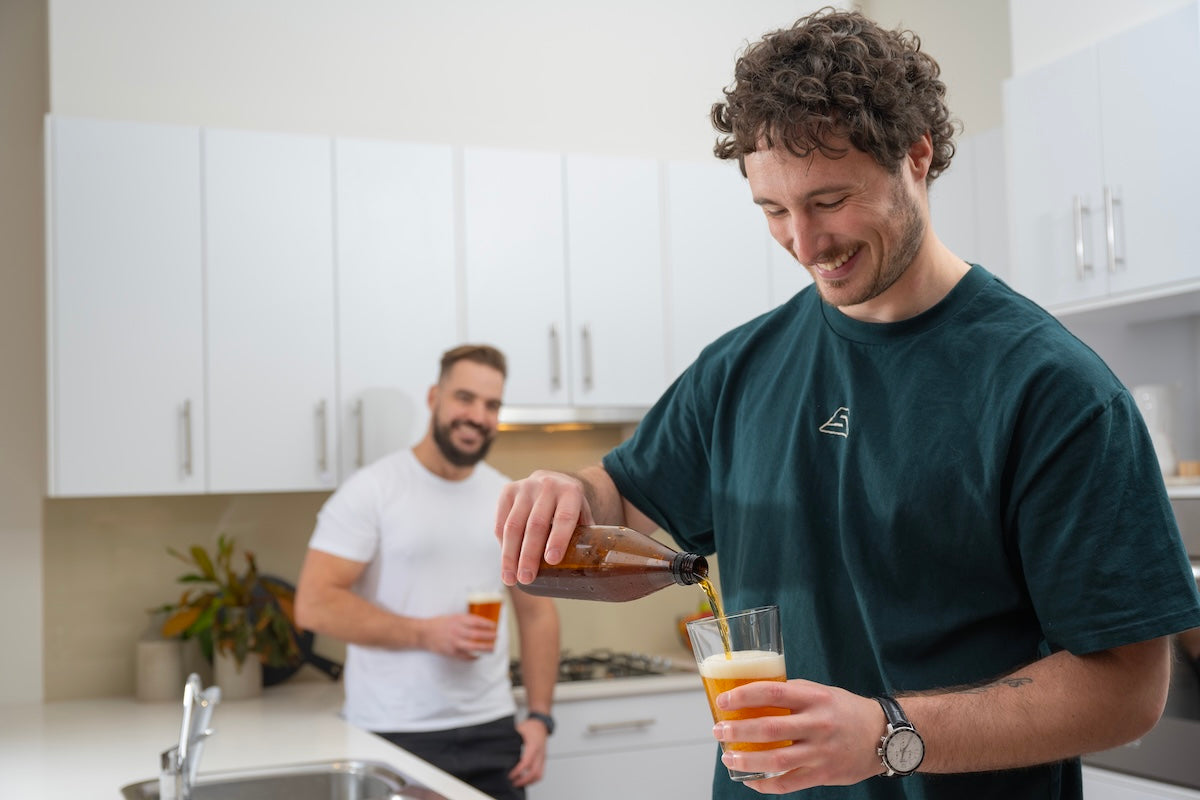
1. Why use a hydrometer?
Many brewers don’t use a hydrometer and have never had exploding bottles. One day their luck will run out! Brewers Yeast is a living organism and, as such, may perform differently from brew to brew. We recommend the use of a hydrometer for checking that fermentation is complete before bottling. The hydrometer is a simple device which, when floated in a sample, gives an indication of the density of the brew. Two separate samples over 24hrs with the same reading indicates that fermentation is complete (Final Gravity - FG). Once FG is achieved, have a taste and a smell of the brew (an infection is usually a sour taste). If it tastes and smells like beer you can bottle confidently in the knowledge that the correct amount of priming will produce the right amount of fizz with no explosions!
For more information, click to watch our how-to-video on Hydrometer Use.
2. How long can a brew be left in the fermenting vessel?
A brew is most at risk of spoilage when the yeast is not active. This may be at the start of the ferment (prior to or just after the yeast is pitched) or at the end of the ferment (when the yeast has sedimented to the bottom of the brew). A brew, fermented with the lid on or clingwrap, should have a protective layer of CO2 gas and may be perfectly fine for several days after fermentation is complete. However, the majority of brewers cannot produce a completely sterile environment for their brew so the longer the brew is left to sit the greater the risk of spoilage. Sample the brew prior to bottling - if it smells like beer and tastes like beer it is probably okay to bottle.
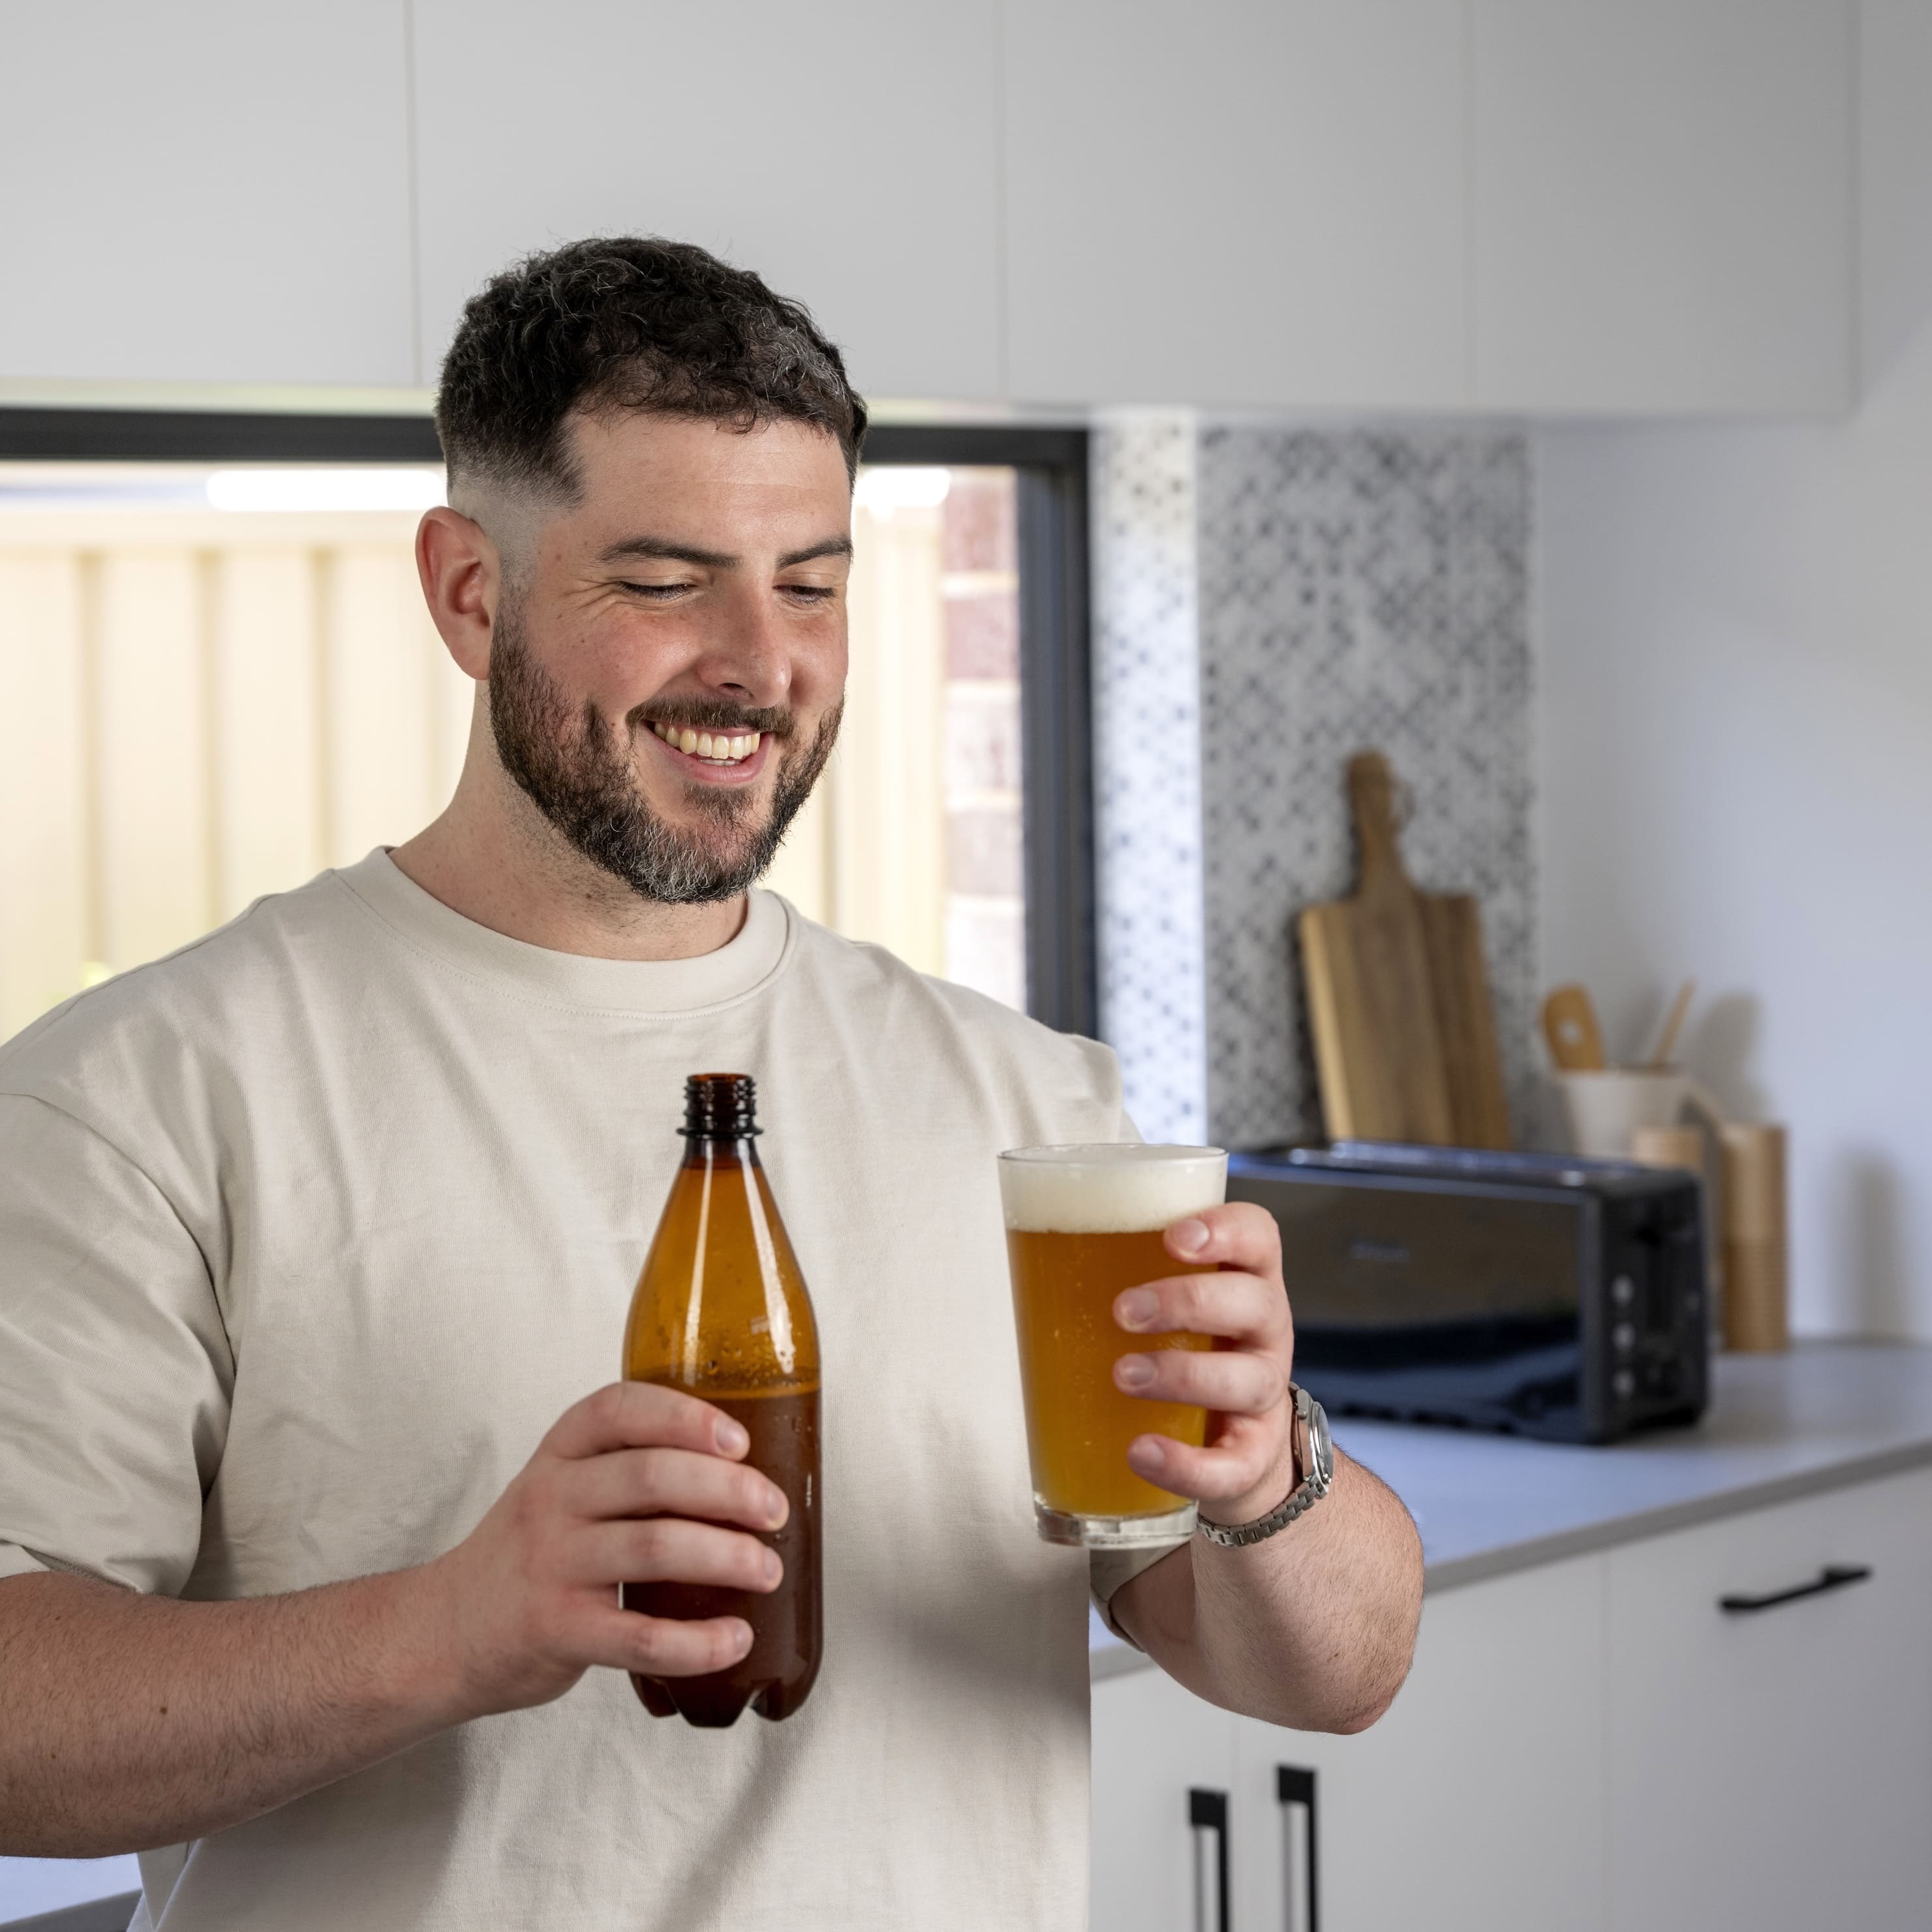
3. Should I use plastic or glass bottles?
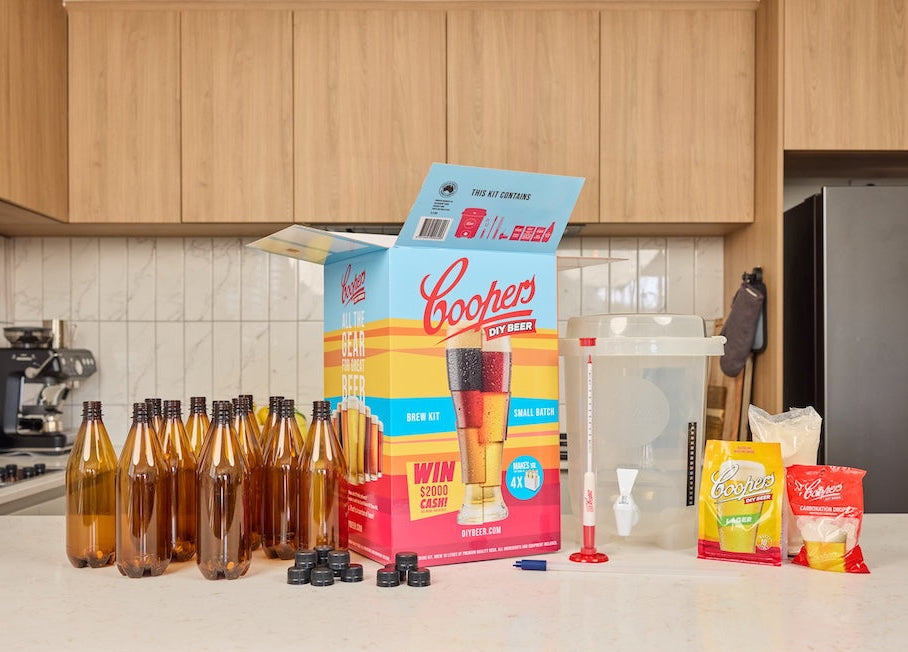
The Coopers DIY Beer Brew Kits include 740ml PET Beer bottles. These bottles are also widely available as a separate item (in boxes of fifteen).
PET stands for polyethylene terephthalate, which is the same plastic used to make soft drink (soda pop) bottles.
Since 2000, Coopers has included PET bottles with the starter kits (initially the Micro-Brew Kit and now the DIY Beer Kit and Small Batch Brew Kit) rather than the traditional crown seals and capper because it was becoming increasingly difficult for new brewers to obtain sturdy crown seal bottles. Today, most commercial beer is packaged in single use glass bottles, which are too thin to stand up to the rigours of continual washing and capping.
The majority of PET bottles are subtly porous and a beverage held in PET will eventually go flat. However, Coopers PET bottles have a nylon barrier, reducing the rate of ingress of oxygen and the loss of CO2 for up to 18 months. The re-usable caps have a tamper evident collar that breaks off after the first use. This does not affect the airtight seal. When the caps eventually wear out, replacement caps can be purchased separately. Note: PET is temperature-sensitive and should not be cleaned using hot water.
A beer, such as an Imperial Stout, intended to be aged for 2 years or more, should be bottled into sturdy glass designed for re-use. With this in mind, Coopers also produce Original Pale Ale, Sparkling Ale and Best Extra Stout beverages in sturdy 750ml glass bottles. These bottles have a lip designed for a prise-off crown seal and weigh more than 500g empty! They are an excellent option for brewers and sauce makers, alike.
4. Kegging beer
There are a couple of options open to you when it comes to kegging. If you are in a hurry for the beer (a party on the weekend) and it will be consumed within a couple of months, then artificial carbonation is the best option. Natural conditioning will give you a better beer in our opinion but the conditioning period is much longer (several weeks as opposed to several days). Well made, naturally conditioned beer will last as long in the keg as it does in bottles (at least two years or so). Artificially carbonated beer will deteriorate after a few months.
Natural Conditioning: Clean and sanitise the keg thoroughly. Prime with sugar at the rate of 4g per litre. Rack via a piece of sanitised, flexible tubing so that the beer runs to the bottom of the keg. Leave 5 – 10 cm of headspace at the top. Seal the keg then invert and give it a shake to mix the sugar and check that the seal is good. Store at 18°C or above for a week, then allow the beer to condition for at least two weeks. Refrigerate for a day or two, momentarily release the keg pressure, then connect the gas at required pouring pressure 35 – 100 kPa, depending on your system. (Fifty litre kegs through a temprite or miracle box may require up to 300 kPa).
Artificial Conditioning (Force Carbonating): Clean, sanitise, purge (purge by connecting the CO2 bottle to force the air out of the keg) and rack as per the natural conditioning procedure, without the priming sugar. If you are in a hurry for the beer, seal the keg, pressurise to 300 kPa and shake it about 100 times (for an 18 – 20 litre keg) with the gas connected. If there is no rush or you’re not feeling energetic, leave the gas connected with the regulator set at 300 kPa for 2 – 3 days. CO2 will be absorbed more quickly if the beer is refrigerated. Place in the fridge for several days then adjust to pouring pressure. The beer will be drinkable as soon as it is cold, but will improve for several weeks in the fridge. For crystal clear beer, rack into a sanitised, airtight, food grade container (flush with CO2 first) and refrigerate for a week. Once the beer is clear, keg and carbonate artificially.
Troubleshooting: Degassing the keg over a day or two will usually rectify over-carbonation. Agitate the keg and release the CO2 several times a day until the beer has reached the desired level of carbonation. If the beer is pouring badly but appears to have little or no carbonation, check to ensure that there are no kinks or holes in the beer and gas lines. Contrary to logic, heady beer can be a result of low gas pressure and increasing the pressure via the regulator will often fix the problem. A short beer line may also be the cause of heady beer. Look to use about 3m of 5mmID line, 2m of 4mmID line or an in-line restrictor.
5. What is the shelf life of a brew once it is bottled?
A well made DIY Beer, being naturally conditioned in the bottled, can be stored for longer than most commercial beer. Generally speaking, a beer style with higher bitterness, alcohol content and colour lasts longer in the bottle and even benefits with bottle age! A beer such as Mexican Cerveza may be consumed within 6 mths while an Imperial Stout may be successfully stored for several years. We suggest tasting a bottle of each brew periodically to gauge how it’s progressing to determine optimum drinking age for your own preferences. Other factors to consider for longevity are the quality of the beer in the first instance, integrity of the pressure vessel and storage temperature (stable and cool).
I still use an airlock
1. Is my brew fermenting?
Many brewers wrongly assume that the yeast is not working because there is no bubbling through the airlock. The airlock is fitted to allow gas to escape and prevent micro-organisms and wild yeasts from entering the fermenter. Do not rely on the airlock as an indicator of fermentation activity. Rather than becoming 'mesmerised' with the airlock, look for condensation inside the lid, a scum ring at the top of the beer, sediment on the bottom, a sample drawn from the tap appears cloudy / turbid / foamy and the specific gravity dropping (use a hydrometer) from day to day.
2. Why is my brew foaming over in the fermentation tub?
Plenty of foam, although messy, is not a bad thing as it indicates healthy yeast and a strong fermentation. Excess foaming is more likely to occur when using ale yeast with darker brews and higher fermentation temperatures. Also seasonal variations may affect the barley (main ingredient in beer apart from water) causing more foam. To avoid foaming over allow for extra headspace by using a bigger fermenting tub or fill to a lower level (around 18-20 litre mark for 23L brews or 8 litre mark for 10L brews) then top up with cool boiled water after initial foaming has subsided (normally after a day or two).
3. The airlock bubbles occasionally (once every couple of minutes or so), is it okay to bottle?
Don’t trust the airlock! A brew may release CO2 gas even though fermentation activity has effectively ceased. The brew is okay to bottle once the specific gravity (measured with a hydrometer) is stable over 2 days.
Better beer
1. Is my brew infected?
Comment – From time to time a Brewer may experience an infected brew.
Fact – All non-commercial beer carries some level of infection. Fortunately, infection is only apparent once the off flavours and aromas reach a certain threshold (perceivable level). Some of us are more sensitive to this than others.
An infected brew may produce the following symptoms –
Appearance; a scum ring inside the bottle and haziness (not due to yeast)
Aroma; vinegar, medicinal or solvent smell.
Taste; sour, sharp or harsh flavour.
Remedy - clean and sanitise all equipment that will come in contact with the brew to minimise the symptoms of infection.
To clean – Soak equipment in water until caked on residue is softened. Remove residue with a soft cloth and rinse thoroughly. Pay attention to ‘hard to get at’ areas. Remove and clean the tap, particularly the threads. NOTE: Do not use any cleaning aid that may scratch the plastic.
To sanitise using Unscented Household Bleach – Add ¼ cup of unscented household bleach to the fermenting tub. Place all equipment in the fermenting tub, fill with cool water and let soak for at least 30mins. Rinse out with hot water to remove all traces of chlorine smell.
Bottles – Clean bottles may be filled with sanitising solution drained from the fermenting tub, left to soak for a further 30mins then rinsed to remove any trace of chlorine smell and drained. DO NOT expose Coopers PET bottles and soft drink bottles to hot water.
2. How do I crack the malt/grain in my recipe?
We recommend cracking your malt/grain on brew day or as required. Our simple, no-mess method requires only a zip-lock plastic bag and a rolling pin. Place the malt/grains in the zip-lock bag and seal, lay the bag flat on a bench top (spreading evenly within the bag) and run a rolling pin over the bag. For best results, do not over fill the bag. As such, it may take a few fills of the bag to crack all the malt/grain.
3. What can I do to control the temperature of my brew?
Most brewers find it easier to keep warm (with insulation) rather than cooling their brew because the brew generates heat as it ferments.
Non-electrical temperature control Wrap the fermenting tub in a 0ºC-5ºC rated sleeping bag , blankets or an old jacket. Place the fermenter in a large esky, insulated box, non-working fridge or freezer. Sit the fermenting tub in a laundry tub with frozen PET bottles. Place the fermenter in a cellar or on a cool bare concrete floor. Partially roll a towel and place in the lid of the fermenter, fill the well of the lid with cold water and drape the towel over the side of the fermenter allowing the water to wick down the towel.
Electrical temperature control Heat pad or heat belt. Tea chest, box, cupboard, old fridge etc. with a 25W-40W incandescent lamp controlled by a thermostat, dimmer switch or timer switch. Place in an air-conditioned room. Place in a working fridge or freezer with modified thermostat. Place near an inside storage hot water system. Wet towel method with an electric fan blowing over it.
4. How do I get my brew to hold a head?
Head retention is adversely affected by the following:
- Glassware has residual detergent or grease.
- Young beer can produce a large foamy head that quickly dies away.
- Too much simple sugar (sucrose or dextrose) in the brew.
- Low carbonation level in the beer.
- A racing ferment due to high temperature.
To check your glassware, get some clear (crystal type) plastic glasses from the supermarket. Pull one straight out of the plastic wrap and place it beside your favourite glass. Fill both with the same brew and compare head retention.
Head retention can usually be improved by replacing some of the sugar/dextrose with malt extract. This will give the added bonus of extra malt flavour.
5. Can the yeast in a Coopers Ale be reactivated for fermenting my brew?
Coopers, encourage DIY brewers to use the yeast from naturally conditioned Coopers ales. The same ale strain is used across the range - Mild Ale, Pacific Pale Ale, Original Pale Ale, XPA, Dark Ale, Sparkling Ale, Best Extra Stout and Vintage Ale.
There are numerous documented techniques, with varying levels of complexity, for re-activating the yeast in naturally conditioned beer. The method described below may leave some readers, experienced in growing yeast cultures, aghast. “What! No stir plate, no alcohol swabs, no nutrient, no way! However, for Coopers yeast, it works...
Method
- Buy a six pack of Coopers Original Pale Ale or Coopers Mild Ale and place upright in the fridge for about a week for the yeast to settle.
- Mix about 600ml of boiling water and 4 tablespoons of Light Dry Malt (60g) in a pyrex jug, cover with cling-wrap and leave to cool in the fridge for about 30mins. If you don’t have Light Dry Malt you can use 4 tablespoons of Sugar (60g), but Light Dry Malt gives the best result.
- Open 4 bottles and decant the beer into a jug, leaving behind the yeast sediment - about a couple of centimetres.
- Pour the sugared water equally into each bottle, cover with cling-wrap and secure with a rubber band.
- Shake the bottles then place them in a dark spot at a temperature in the mid 20’s.
- Give the bottles a shake in the morning and at night to keep the yeast in suspension.
- After around 2 to 3 days the yeast should become active and begin forming a head.
- Pitch the active yeast into a brew immediately or store in the fridge for about a week. Just remember to pull it out of the fridge to warm for couple of hours prior to pitching.
Some additional points to keep in mind;
- start with more yeast by using all 6 bottles,
- buy beer with the freshest yeast (latest “Best After” date),
- lower alcohol content is better (mild ale or pale ale),
- it’s okay to hold the culture at slightly higher temps to promote a quicker reactivation,
- one sanitised vessel (approx 1 litre) may be used rather than separate bottles,
- make sure the culture smells okay before pitching,
- buy another 6 pack for each culture,
- don’t forget to drink the decanted beer,
- use malt extract rather than sugar when re-activating yeast from your own bottles or other commercial brands.
For more information, click to watch our how-to-video on Harvesting Commercial Yeast
6. Where can I find recipes for making different types of beer?
All Coopers DIY Beer recipes can be found in our Recipe Library. For future reference 'Recipes' is accessible at the very top of our website on desktop view, or via the main pop-out menu on mobile. Use the dropdown filter to filter recipes by beer style, flavours, volume, ABV, EBC or IBU.
7. Each of your recipes has a difficulty rating of Easy, Intermediate, Advanced or Expert. How do I know what each rating involves?
- Easy: Basic brewing, but beautiful beers! Brewing Extract + Fermentable; requires only a can opener, scissors, spoon and water. Or for a little more, an extra ingredient commonly found in the pantry.
- Intermediate: Simple additions to enhance your brews! Introducing hops, herbs and flavourings which are added during or at end of ferment.
- Advanced: For adventurous brewers adding grains and hops will elevate your brews! Grain and hop ingredients typically involve proper handling techniques and extra equipment, prior to mixing.
- Expert: Brew the ultimate DIY Beer! Make up a yeast culture, source your grains or roast your malt – good things take time so you’ll need to be prepared before brew day.
Brewing and Health
1. Can I make non-alcoholic beer with Coopers brewing extracts? Is there an extract suitable for diabetics?
No, you can not make non-alcoholic beer with Coopers brewing extracts.
You can brew a low alcohol beer, approximately 2.5% ABV using a Coopers 1.7Kg Brewing Extract, adding only the extract and no adjunct to the FV, when brewed to 23L.
For Small Batch Brews (10L), you can brew a low alcohold beer, approximatley 2.5% ABV using Coopers Lager, Australian Pale Ale or Mexican Cerveza Brewing Extracts, adding only the extract and no adjunct to the FV, when brewed to 10L.
You can make a low carb, mid-strength beer, approximately 3.5% ABV, using the Coopers Ultra Crisp Mid brewing extract mixed to 10L with no adjunct added.
Carbonation Drops (or priming sugar) are still used for secondary fermentation in the bottles for both the low-alcohol and mid-strength brews.
For anyone seeking a lower alcohol brew for health reasons, we recommend consulting with your GP on this topic before brewing.
2. How do I make a low carbohydrate beer?
Carbohydrates in beer are in the form of alcohol and residual sugars. To reduce the amount of carbohydrates in the brew the amount of fermentable materials in the recipe should be reduced. This is achieved by adding a brewing enzyme to help the yeast metabolise the sugars more thoroughly.
You can brew a low carb, mid-strength beer (approx. 3.5% ABV) using the Coopers Ultra Crisp Mid brewing extract. This extract includes a low carb enzyme that is added to the brew with the yeast, resulting in a brwe with 3 Grams of Carbs per 375ml glass.
Low carb brewing enzymes are also available at specialist brewing stores.
3. How do I make beer suitable for gluten intolerant people?
All Coopers Beer Kits contain malt extract - derived from malted barley - and, as such, are not suitable for gluten intolerant people.
No FAQs match your search.
Still need help?
Get in touch with our team via phone or email us below!